Pin by Marcos Ruiz on Garden Art/Projects Stacked flower pots

Nine is Fine Tipsy Pots Tuitorial
Tipsy Pots Tower. Create a space birds will love to gather with this tipsy pot flower tower. The lower pots are used for flowers while a small bird bath is at the top. See photos of the project here. 2 / 12. Photo: Courtesy of Prairie Rose's Garden. File Cabinet Tower.

Tipsy Pots Pat Ferguson Quilts
assemble your planter. Fill the bottom pot up with dirt, almost to the top. Add another nut and then a washer to the threaded rod. Slide / twist these down the rod so that they sit just above the dirt in the big pot. Slide one of the smaller (6.5 inch) pots down the metal rod and nestle it into the dirt at an angle.

Topsy Turvy Flower Pots Chasing Supermom Topsy turvy flower, Flower
Topsy Turvy Planters Put your garden on the Slant. Plastic pots will work too but I like terra cotta because the pots are going to be placed on a slant and plastic might give a bit over time from the weight. Just start from the bottom. Place the piece of rebar into the hole of the bottom planter and pound it securely down into the ground.

Painted TipsyPots Pot, Planter pots, Diy crafts
Take your first pumpkin and slide it down over the stake, going through the middle hole in the bottom and the enlarged handle hole. Nestle the pumpkin firmly down into the soil. Fill the pumpkin with potting soil and add plants. Repeat with the next pumpkin, this time sliding the stake through the opposite enlarged handle hole.

Topsy Turvy Planters Gardening on the Slant The Gardening Coiok
We made an adorable planter for annuals! Using an old watering can and some bright colored pots we made an annual planter waterfall.
Tipsy Pots The Tabletop Edition! Birds and Blooms
We came across GardensAndCrafts.com with instructions to make a Tipsy Pot tower. Angels sang, golden light flooded my workspace. That's just the project those pots were made for. A tower of pots provide that height I so enjoy, vertical gardening is captivating. The tower design is a great water saver, a positive application of the trickle.

DIY Project Build Your Own Tipsy Pots Planter Our Fairfield Home
Fill a larger pot with two to three inches of soil. Once cured, place it in the pot with soil. Fill the remaining space with soil. Step 4: Thread a pot onto the rebar down to the soil. Tip it and rest its top edge against the rebar. Repeat the process, alternating the tilt until all the pots are threaded.

Colorful tipsy pots Planter pots, Pot, Planters
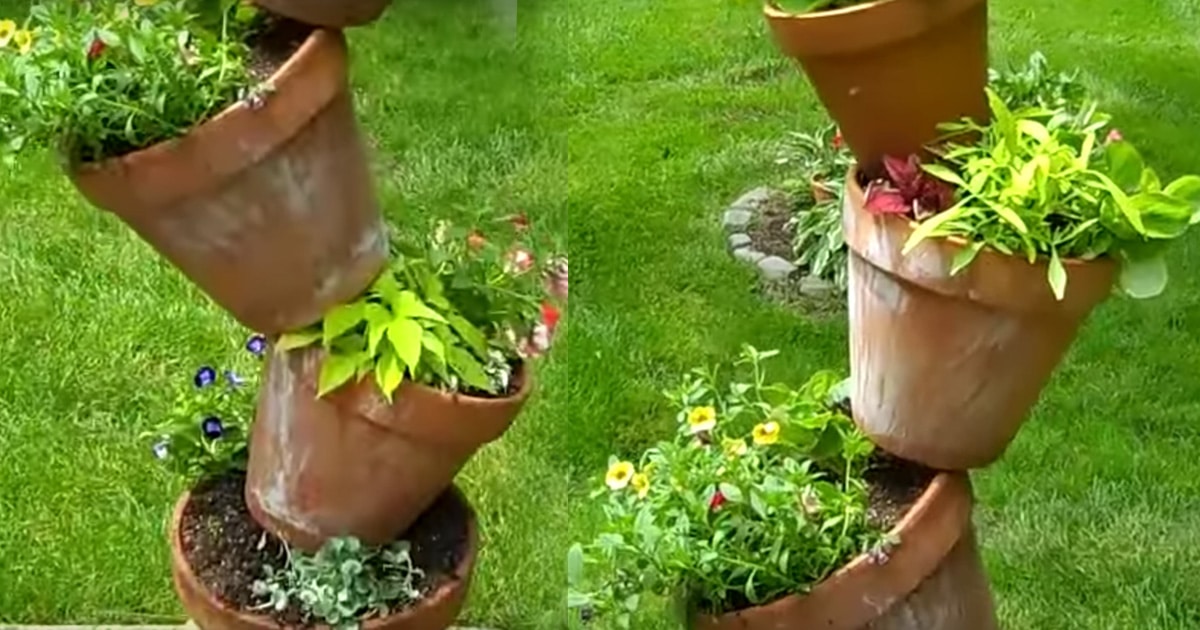
First, Drive the stake or rebar into the ground about a foot. Leave enough space to slide each of the pots down over the stake. Slide the first pot down the stake through the drainage hole in the bottom of the pot: Fill the pot with soil, plant seeds of your choice, water, then tilt the pot slightly sideways.

See Molly Create DIY Tipsy Plant Pots
Step 1: Step 1 - Prepare the Site. First, clear a spot in your garden. Remove the sod and pound in a 66" long piece of 1/2" diameter rebar into the soil at least two feet. This is very important for stability as the pots being stacked on it will be heavy with soil, water and plants. Surround the area with several layers of black/white newspaper.

DIY mini tipsy pots Tipsy, New Pins, Deco, Planter Pots, Gardening
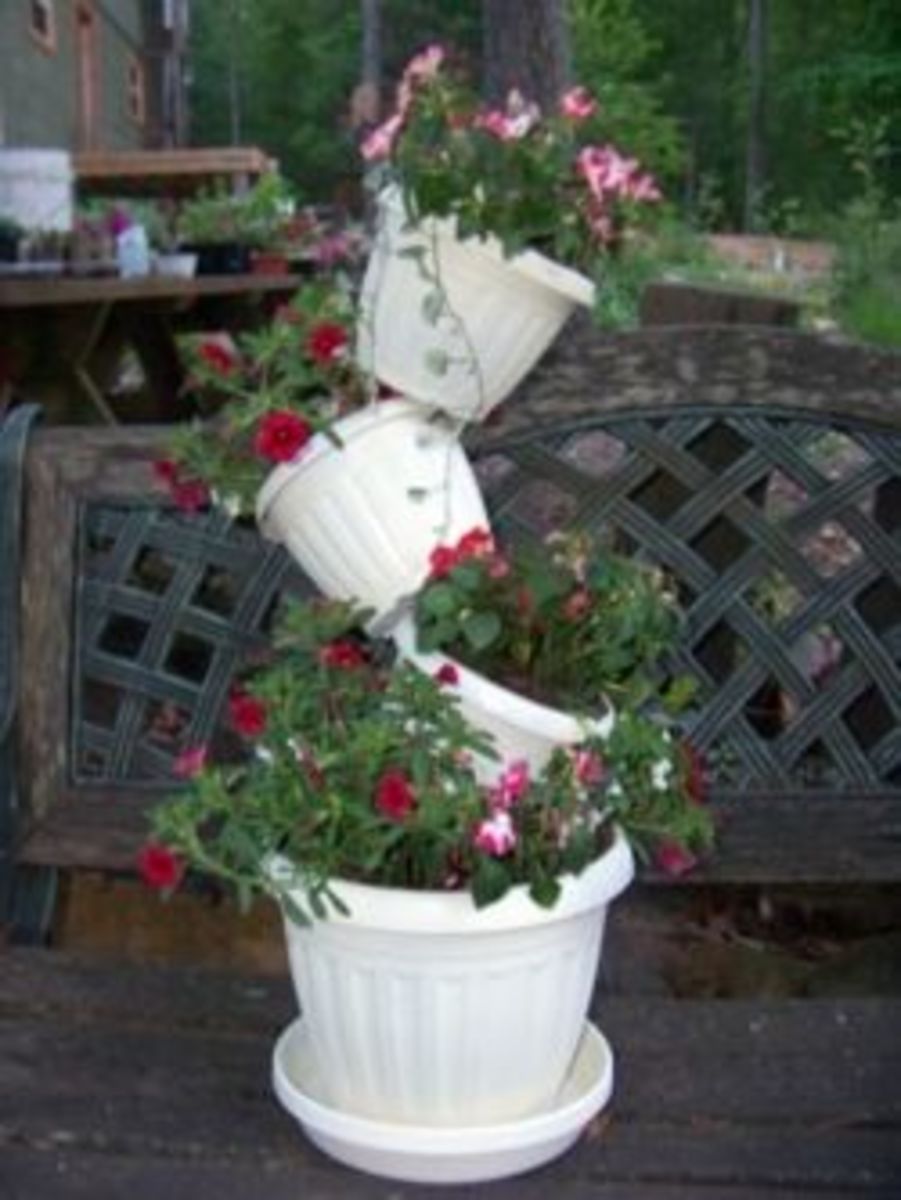
Step 4: Tipsy Topsy Turvy Garden Pots. Thread the next pot onto the rebar/dowel and tilt to the other side; fill and plant. Continue adding pots until they are all are stacked, filled, and planted then top with a bowl if you want a bird bath or another decorative piece such as a bird, watering can, or other decorative piece.
Gardening DIY Tipsy Pot Planter
Sousville in Isère (Auvergne-Rhône-Alpes) is a town in France about 317 mi (or 511 km) south-east of Paris, the country's capital city. Current time in Sousville is now 05:33 PM (Tuesday). The local timezone is named Europe / Paris with an UTC offset of one hour. We know of 12 airports near Sousville, of which 4 are larger airports.
Tipsy Pots HubPages
This fun and informative video from Tamara at the Tamara Twist shows you how to make a tipsy pot for your garden or balcony. Cute, fun and functional. here.

MAY DAYS How To Make A TipsyPot
1 bag Potting Mix. Annual flowers and vines. Hammer rebar into ground in desired location. Bury approximately two feet deep. It must be secure for structure to work. Thread rebar through bottom of first pot and slide it down to the ground. Add plants and potting mix until one inch below lip to help hold water in.

21 best images about Tipsy Pots on Pinterest Sweet home, Planters and
Step 1: Here's What You Will Need: Five 6" standard terra-cotta pots. One 10.5" azalea pot. One 12" terra-cotta saucer (the ones that go under the plants to catch liquid) Acrylic paints (various colors) Paint brushes. Turkey baster with bulb removed (I pressed it in paint to make the outline of the polka dots)

Tipsy pots are flower pots arranged in a stack to look like they are
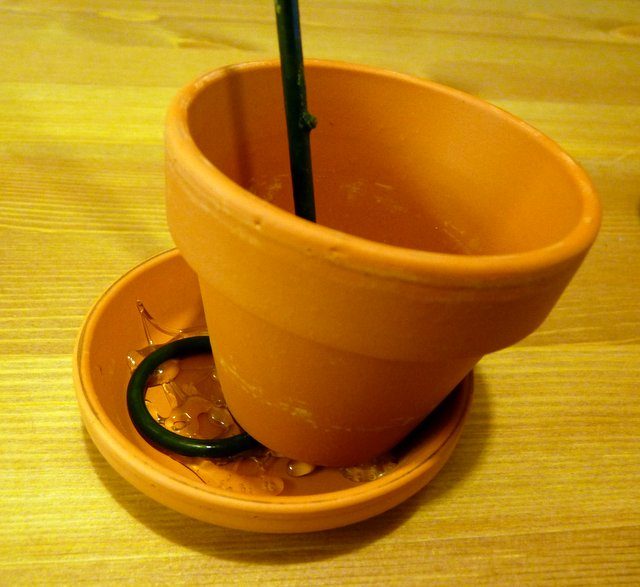
Three of them are 2 1/5 inches in diameter, and 2 of them are 3 1/2 inches in diameter. Five little miniature terra cotta clay pots for only $2, and exactly what I needed for a mini plant tower! I had a little metal stake that was just the right size. The stake was from repurposing a Christmas tree.

MAY DAYS How To Make A TipsyPot
4. Colorful Tipsy Tower. I like how Tiaras & Bowties used these cute colorful pots for her tipsy tower. 5. Wooden Flower Tower. Simply Designing filled this pretty flower tower with pansies for spring but you could do the same with summer flowers. 6. Bright & Cheery Tipsy Planter. Love the color of the pots in this tipsy tower by Daydreaming.
